I love rice — it’s comforting, versatile, and goes with just about everything. But I’ll be honest: I constantly forget the exact water-to-rice ratio, especially when I parboil it first or switch between different types like jasmine and basmati. I also worry about arsenic, especially since rice tends to absorb more of it than other grains.
This guide is my personal cheat sheet. If you’ve ever second-guessed your pressure cooker settings or ended up with rice that’s too wet, too dry, or bland — you’re not alone. Here, I’ll walk you through the process of cooking rice in a pressure cooker with confidence. You’ll get:
- A simple step-by-step method for any type of rice
- Tips on seasoning without overcomplicating it
- Flavor combos that make plain rice crave-worthy
- The safest way to reduce arsenic while still getting fluffy results
Let’s make rice the easy way — without standing over the stove, wondering if it’s done yet.
Why Cook Rice in a Pressure Cooker?
If you’ve ever hovered over a pot, waiting for it to boil — only to have it bubble over or turn into a sticky mess — you’ll understand why I love pressure cooking rice.
Here’s what makes it a game-changer:
- Speed without sacrificing texture: Most white rice finishes in under 10 minutes of pressure time. Brown rice? Still faster than stovetop.
- Set it and forget it: No need to babysit or stir. Once you lock the lid, the pressure cooker does the rest.
- Consistent results: The sealed environment helps evenly cook each grain, so you’re not left with mushy bottoms and crunchy tops.
- Energy efficient: It uses less heat and water compared to traditional methods — great for small kitchens or hot days.
For me, it’s also about predictability. I can parboil to reduce arsenic, then pop the rice in the pressure cooker while I prep the rest of dinner — no measuring drama, no second-guessing.
Step-by-Step: How to Cook Perfect Rice in a Pressure Cooker
Whether you’re keeping it simple or seasoning it up, this method gives you fluffy, separate grains every time. No rice cooker required.
📝 Ingredients:
- 2 cups rice (basmati, jasmine, or preferred type)
- 2 cups water (adjust for rice type or if pre-boiled)
- 1 tbsp oil or butter (optional but helps with texture)
- 1–2 tbsp seasoning blend (homemade or store-bought)
- Salt to taste
🔁 Reminder: If you parboil, reduce the water in this step to ¾ cup per 1 cup of rice.
🔪 Instructions:
- Rinse (or parboil) your rice
Rinse until the water runs clear. If parboiling to reduce arsenic, boil in excess water for 5 minutes, then drain. - Add everything to the pot
In your pressure cooker insert, combine rice, water, oil or butter, salt, and seasoning. Stir gently to distribute. - Seal and set
Lock the lid and set the valve to Sealing. Use the Rice setting, or if unavailable, cook on High Pressure:- White rice: 4–6 minutes
- Brown rice: 15–20 minutes
- Wild rice: 22–25 minutes
- Let pressure release naturally (at least 10 mins)
This keeps the texture fluffy and avoids sticking. After 10 minutes, release any remaining pressure manually. - Fluff and serve
Open the lid carefully, fluff with a fork, and taste. Add more seasoning or a drizzle of butter if needed.
This is the method I use on autopilot now — especially when multitasking dinner. No burned bottoms, no guesswork.
Keep Warm Setting — How Long Is Too Long?
Most pressure cookers flip to “Keep Warm” automatically after cooking — which is convenient, until your rice turns into a dry, compacted block.
Here’s how to avoid that:
⏰ How Long Is Safe?
- Ideal window: 1–2 hours
- Maximum: 4–6 hours (beyond this, texture suffers)
The longer rice sits, the more moisture escapes. The bottom layer dries out first, especially if it’s touching a hot metal insert. I’ve left it too long more than once — you end up scraping rice off the bottom like it’s lasagna crust.
🍽️ What to Do Instead
- Fluff it right after pressure release: This helps it stay airy and less likely to clump.
- Serve within 2 hours for best taste and texture.
- Storing leftovers? Transfer to a container once it cools slightly and refrigerate. It keeps for 4–6 days.
🔥 Tip: Reheat leftovers with a splash of water and cover with a lid to steam it back to life.
If you’re not eating it soon, it’s better in the fridge than sitting on “Keep Warm” all evening.
Flavoring Options — When to Add What
Cooking rice in a pressure cooker doesn’t mean sacrificing flavor — it just means knowing when to add what.
Here’s the breakdown I use so the flavors shine and nothing gets lost in the steam.
✅ Add Before Cooking
These flavors infuse the rice while it cooks:
- Spices: cumin, turmeric, paprika, garlic powder, chili powder
- Broths: veggie, chicken, beef — replace water 1:1
- Aromatics: sauté garlic, onions, or ginger right in the pot before adding rice
- Oils: butter, olive oil, or sesame oil to keep grains from clumping
- Salt: season the water to flavor the rice from the inside out
If I’m feeling lazy, I just throw in a bouillon cube with a splash of oil and call it a day.
✅ Add After Cooking
These ingredients are better added once the rice is done — they keep their flavor and texture this way:
- Fresh herbs: cilantro, parsley, green onion
- Citrus: lemon or lime zest/juice
- Cheese: feta, parmesan, or shredded cheddar
- Toasted nuts: almonds, pine nuts, cashews
- Dried fruit: raisins, cranberries, chopped apricots
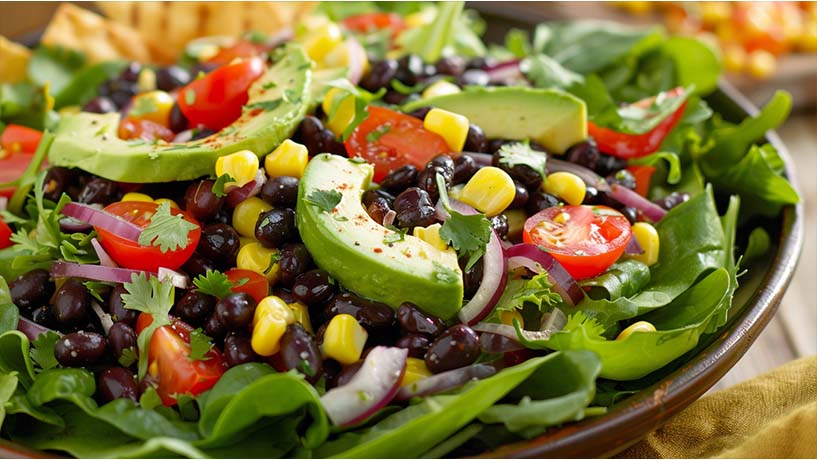
Quick Flavor Combinations You Can Copy:
- Garlic Butter Rice: Add garlic powder + butter before cooking
- Lemon Herb Rice: Add rosemary + lemon zest after cooking
- Spicy Mexican Rice: Add chili powder, cumin, and paprika before cooking
- Coconut Rice: Replace half the water with coconut milk before cooking
- Mediterranean Rice: Use oregano and sun-dried tomatoes before cooking, then stir in feta after
🍚 Bonus Tip:
If you’re cooking for picky eaters or meal prep, keep the seasoning simple. You can always dress it up after with sauces, herbs, or protein toppings.
The Arsenic Concern in Rice (And What I Do About It)
This was the whole reason I started double-checking how I cook rice. Once I learned that rice absorbs more arsenic than most grains, especially when grown in flooded fields, I couldn’t un-know it.
But here’s the good news — you can reduce your exposure without giving up rice.
🧪 What Is Arsenic & Why It’s in Rice
Arsenic is a naturally occurring element, but the inorganic form (the harmful kind) is also a result of pollution and pesticide runoff. Rice grown in waterlogged conditions — like most paddy fields — soaks up more than other crops.
- Brown rice tends to have more arsenic (because it retains the outer layer).
- White basmati and jasmine rice usually have less.
- Rice grown in California, India, and Pakistan typically has lower levels than rice from the southern U.S.
🧼 How to Lower Arsenic in Cooked Rice
You don’t need a lab — just a pot of boiling water and a rinse.
Here’s what I do:
- Rinse rice thoroughly until the water runs mostly clear.
- Parboil method:
- Boil the rice in a large pot with lots of water (like pasta: 1 part rice to 6 parts water).
- After 5 minutes, drain and transfer to the pressure cooker to finish.
- Skip brown rice sometimes if arsenic is a concern, especially for kids.
One study showed this method can reduce arsenic levels by up to 57%. Worth it for peace of mind — especially if rice is a weekly (or daily) staple in your house like it is in mine.
Frequently Asked Questions
Can I parboil rice before pressure cooking?
Yes — and if you’re concerned about arsenic, you should. I boil my rice like pasta in a big pot of water for about 5 minutes, then drain and finish it in the pressure cooker. This extra step reduces arsenic and improves texture for some varieties like basmati or jasmine.
How much water should I use in a pressure cooker for rice?
The default is a 1:1 ratio — one cup of rice to one cup of water.
If you’ve parboiled the rice first, reduce water to about ¾ cup per cup of rice (the rice is already partially hydrated). For brown or wild rice, increase water to 1¼ to 1½ cups and extend cook time.
Is pressure cooker rice healthier than rice cooked on the stove?
Health-wise, it’s about the same unless you use parboiling techniques to reduce arsenic. Where pressure cooking really wins is in consistency, speed, and keeping more flavor in the rice thanks to the sealed environment.
Does adding seasoning before pressure cooking reduce the flavor?
Not if you season smartly. Spices and broths hold up great under pressure. But for bright or delicate flavors — like fresh herbs, citrus, or cheese — it’s better to add them after cooking to keep them vibrant.
What if I open the lid and the rice looks undercooked?
Don’t panic — just add ¼ cup water, reseal the lid, and pressure cook for 2–3 more minutes. I’ve done this when switching rice types or after forgetting I parboiled. It’s fixable.
Rice Serving Size Chart (With Handy Portion Guide)
Ever eyeball rice and end up with either way too much or not nearly enough? Been there. This chart helps you scale rice portions whether you’re cooking for one or feeding a crew.
🍽️ Rice-to-Water Ratio Chart (1:1 Standard Ratio)
| # of People | Uncooked Rice (cups) | Water (cups) | Yields Cooked Rice (approx.) |
|---|---|---|---|
| 1 | ¼ | ¼ | ½ cup |
| 2 | ½ | ½ | 1 cup |
| 3 | ¾ | ¾ | 1½ cups |
| 4 | 1 | 1 | 2 cups |
| 6 | 1½ | 1½ | 3 cups |
| 8 | 2 | 2 | 4 cups |
| 10 | 2½ | 2½ | 5 cups |
✍️ Tip: This assumes ¼ cup uncooked rice per person (standard side dish portion).
Double it if rice is the main event (like with curries or stir fry).
📌 Optional Prep Reminder:
- If you parboil, reduce the pressure cooker water slightly.
- For brown or wild rice, increase water by 25%.
Want to keep this handy? Print it, bookmark this page, or pin it to your kitchen corkboard.