If you’ve ever stared in the mirror, wishing for a fresh cut but dreading the cost and chaos of a salon visit, you’re not alone. I used to think I had to choose between split ends and a hundred-dollar bill — until I discovered how easy it is to cut an A Line Bob at home using just a few ponytails and the right tools.
This method has saved me time, money, and more than a few headaches. Whether you’re juggling kids, a busy schedule, or just want more control over your hair, this guide walks you through a DIY haircut that actually looks polished. If you’re new to at-home cuts, I also recommend checking out my 5 Easy DIY Ponytail Haircuts — it’s a great place to start building confidence with simple, foolproof styles.
Let’s get into it.
Why Cut Your Hair at Home?
There is a certain freedom that comes with learning to cut your own hair. No scheduling appointments weeks out. No arranging childcare. No sitting under fluorescent lights making awkward small talk while you quietly wonder how much this is going to cost once the tip is added.
For me, the turning point was realizing I did not need a professional every time I wanted a simple refresh. I just needed the right technique and a little bit of courage. Once I learned the ponytail method, I felt like I had unlocked a secret. One that gave me a fresh A Line Bob without ever leaving my bathroom.
Whether you are trying to save money, reclaim your time, or just want more control over how your hair turns out, cutting your hair at home is one of those rare things that is both empowering and practical.
What Is an A Line Bob?
An A Line Bob is a classic haircut where the hair is shorter in the back and gradually gets longer toward the front. The angled shape frames the face beautifully and gives the illusion of more volume and movement, even if your hair is fine or straight.
What makes this cut so popular is how versatile it is. You can wear it sleek and polished, messy and textured, or anywhere in between. It works on most hair types and face shapes, which is probably why so many salon stylists recommend it as an easy way to refresh your look without going too short.
The best part? It is surprisingly easy to do at home. Unlike layered cuts that require careful sectioning and advanced angles, the A Line Bob can be achieved with a ponytail method and a bit of blending. It looks intentional even if it is not perfect, which makes it the ideal beginner haircut.
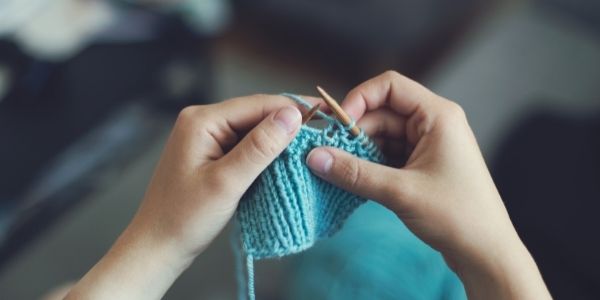
Tools You Will Need
Before you start, gather a few basic tools. You do not need anything fancy, but using the right items will make a big difference in the final result.
- Sharp hair cutting scissors
Regular household scissors can cause split ends and an uneven cut. Invest in a good pair designed for hair. - Hair razor or texturizing razor
This helps blend the ends and soften any harsh lines, especially around the front. - Three hair elastics
These will hold your sections in place and act as cutting guides. - Fine-tooth comb
Useful for parting and smoothing each section evenly before cutting. - Mirror setup
If you are doing this solo, try positioning a second mirror behind you so you can see the back. A phone camera or mirror app works in a pinch.
Having everything laid out ahead of time makes the process smoother and a lot less stressful. No scrambling mid-cut with hair falling into your eyes.
Step by Step Instructions for the Ponytail A Line Bob
This method uses ponytails to guide the shape of your cut. It is simple, beginner friendly, and surprisingly effective. Take your time, especially the first go around. You can always trim more, but you cannot put it back.
Step 1: Section your hair into three ponytails
Make two side ponytails just above your ears, and one at the back near the base of your neck. The back ponytail will determine your overall length.
Step 2: Slide the elastic on the back ponytail to your desired length
This elastic acts as a guide. Line it up with where you want the shortest part of your bob to fall. Keep your chin tucked slightly when you adjust, so the angle does not end up too steep.
Step 3: Cut straight across just below the elastic
Use your scissors to make one clean cut under the band. Then, take your razor and lightly go over the ends to soften the blunt edge.
Step 4: Release the side ponytails and begin blending
Let down the two front sections and use your razor to angle them slightly downward toward your chin. Work slowly. You are tapering the hair from the back to the front to create the A Line shape.
Step 5: Final detail work
Comb everything out and check for balance. Run the razor gently along the ends to even out any choppy areas and add movement. You are not reshaping here, just blending.
Take a breath. You just gave yourself a real haircut.
Video Tutorials That Helped Me Feel Confident
Before I ever picked up the scissors, I watched a lot of DIY haircut videos. These three stood out because they were clear, beginner friendly, and actually gave me the confidence to go for it. Even if you do not follow each one exactly, seeing the process from different angles can help you feel more prepared.
1. Long Bob Haircut Using Ponytail Technique
This one walks you through a long bob using the classic ponytail method. It is great if you want something subtle and easy to manage. I paused a lot during this one and followed along step by step.
2. DIY A Line Bob for Beginners
This video helped me understand the angle better. The creator shows how to shape the front so it frames your face and blends naturally into the back. It made the blending part feel much less intimidating.
3. Cut Your Own Hair — A Line Bob by Belle4u
Belle4u’s laid back style was exactly what I needed. She reminds you that hair grows back and shows how you can still get a clean A Line even if your technique is not perfect. Very reassuring if you are nervous.
I recommend watching all three before starting. They each offer something a little different, and together they give you a full picture of how to approach your own cut with confidence.
Tips for First Time Home Haircuts
Cutting your own hair can feel intimidating at first, but a few smart tips can make it way less stressful and a lot more fun. Here are some things I wish I had known before picking up the scissors.
Start longer than you think
It is much easier to take more off than to wish you had not cut so much. Begin conservatively and check the length as you go.
Use a razor for blending, not shaping
Scissors give you structure, but the razor is what softens and blends the ends. Use light, downward strokes and stay relaxed. The goal is to smooth, not reshape.
Tuck your chin slightly when cutting the back
This helps you get the right angle for the A Line shape. It might feel unnatural, but it makes a big difference in the final result.
Use clips to clean up flyaways
Loose pieces can sneak into the wrong section and get chopped by mistake. Clip them out of the way so each ponytail is clean and controlled.
Phone camera check
If you do not have a second mirror, use your phone’s camera to check the back. A quick video can show you if the cut looks even before you finish.
And finally, give yourself some grace. It might not be perfect the first time, but you will learn what works for your hair and get better with each cut.
DIY A Line Bob at Home
Can I do this cut on curly or thick hair?
Yes, but it helps to straighten or stretch your curls first so you can see the actual length and shape. Curly and thick hair tend to shrink when dry, so if you cut without adjusting for that, it may end up shorter than you intended. Go longer than you think, especially the first time.
What if I mess up the angle?
The good news is the A Line shape is very forgiving. If one side looks longer, use the razor or scissors to carefully match it. Worst case, you can turn it into a straight bob or soften it with waves and no one will notice. Most uneven cuts are fixable with a little blending.
How often should I trim it to keep the shape?
If you want to maintain a sharp angle, trimming every 6 to 8 weeks works well. If you are okay with it softening into a lob, you can stretch it longer. Keep an eye on the front pieces, they tend to grow out the fastest.
Is this method safe for kids or someone else’s hair?
Yes, but with extra caution. Make sure the person stays very still and use clips to keep sections tight and clean. Start slow and double check your guide length before making the first cut.
Can I layer it too or just stick to the angle?
This ponytail method is mainly for shaping the A Line angle. If you want layers, that is a different approach and requires more sectioning. You can always add soft face-framing layers later using a separate guide if you want more texture around the front.